Want to send emails that look professional and actually reach your inbox? You need your own sending domain. It’s not as complicated as it sounds (I promise).
When you don’t set this up, your emails show “sent via” some random server name. That looks sketchy. Customers ignore those emails, or worse, they land in spam.
This is exactly why setting up an LC email domain early makes such a big difference.
Why Your Business Needs Its Own Sending Domain
Think of a sending domain like your business’s return address. When emails come from your actual domain, email providers trust them more. Simple as that.
Here’s what happens without it: Your emails get flagged. They look suspicious. Recipients see “sent on behalf of” weird server names they don’t recognize.
With your own domain? Your brand name shows up clean. No weird tags. No spam folder.
Creating Multiple Domains for Different Purposes
You’re not stuck with just one domain. You can set up several and use each one for specific tasks.
Send your newsletters from one domain. Use another for payment reminders. Keep your one-on-one emails separate from bulk campaigns.
This keeps everything organized and protects your main domain reputation.
Step 1: Find Your Email Services Section
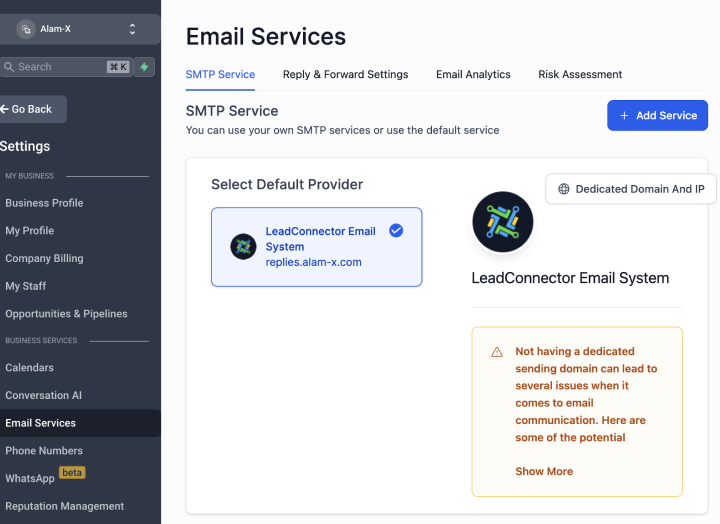
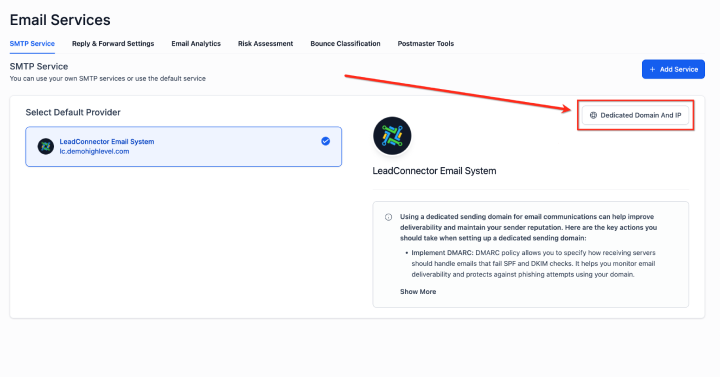
Go to Settings, then look for Email Services. Click on “Dedicated Domain and IP.”
That’s your starting point.
Step 2: Enter Your Domain Details
Hit the “Add Domain” button. You’ll need to type in a subdomain (like mail.yourbusiness.com or send.yourbusiness.com).
Don’t use your main domain here. Always use a subdomain. It’s safer and gives you more flexibility.
Step 3: Set Up Your DNS Records
This is where most people get nervous. Don’t be. You’ve got two options here.
The platform can do it automatically if it has access. If not, you’ll add the records yourself through wherever you bought your domain (GoDaddy, Namecheap, whoever).
The system gives you exact instructions. Copy the records they show you and paste them into your domain provider’s DNS settings.
Adding Records Yourself
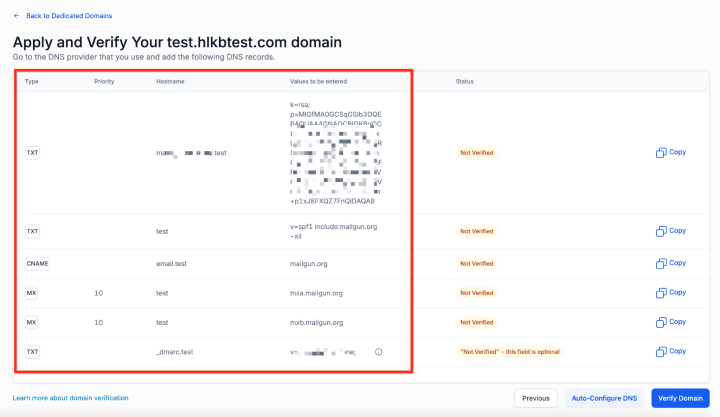
Your domain host has a DNS management area. Look for it in their dashboard. You’ll create new records using the information LC Email provides.
It’s basically copy and paste. Type matches type (like CNAME or TXT), name matches name, value matches value.
Give it 10-15 minutes to work. Sometimes DNS changes take a bit to spread across the internet.
The Problem With Shared Domains
When you use a shared domain (one that everyone else uses), the system changes how your email address looks behind the scenes.
You think you’re sending from support@yourbusiness.com. But it actually sends as support+yourbusiness.com@somesharedserver.com.
Confusing, right? That’s why your own domain matters.
This refactoring happens automatically on shared domains. Your branding gets diluted. Your “from” address looks different than what you intended.
Skip this mess entirely by setting up your dedicated domain.
No Spam. No calls. Unsubscribe anytime.
Fixing Common Problems
Sometimes the setup hits a snag. Here’s the main issue people run into.
“Domain Already Connected” Error
See an error saying your domain points to another email server? That means you’ve got old DNS records still active somewhere.
You need to remove any MX or SPF records first. Even old LC Email records can cause this. Clean them out completely.
Use MX lookup tools online (MXToolbox is a good free one). Check what records exist for your domain. Delete the ones pointing to email servers.
Then try adding your domain again. It should work fine after that.
What Happens After Setup
Once your DNS records verify (usually takes a few minutes to an hour), you’re done. Start sending emails through your new domain.
Your emails will show your actual business name. No more “via” labels. No more spam folder problems.
Test it first. Send yourself a few emails. Check how they look in different email clients. Make sure everything appears correct.
That’s it. Your email marketing just got a whole lot more professional.